

Your Complete Guide to the Inspection of Ladders
A routine inspection of ladders is, without a doubt, the single most effective way to prevent falls from height. It’s a quick, systematic check to make sure your equipment is free from damage and safe to use, forming the very foundation of workplace safety as mandated by UK regulations. As a family-owned British manufacturer of safety equipment since 1972, we've seen first-hand how a few minutes spent on a proper check can make all the difference.
Why Ladder Inspections Are a Bedrock of Workplace Safety
 It’s easy to see a ladder inspection as just another box-ticking exercise on a long to-do list. We get it. But a small, overlooked detail—a hairline crack in a stile or some slick mud on the feet—can be the difference between a normal day on the job and a life-changing accident.
The reality of falls from height is sobering. Statistics from the UK's Health and Safety Executive (HSE) show that falls from height account for more than 30% of all fatal injuries. When you dig into those numbers, you find ladder-related falls are a huge part of the problem.
Over a three-year period, the HSE investigated 150 fall-related cases and found that 40% of falls from height happened specifically from ladders. This alarmingly high rate highlights the critical risk ladders can pose, which is exactly why legal requirements were established under The Work at Height Regulations 2005.
Understanding Your Legal Duty
The Work at Height Regulations 2005 isn't some complex legal document designed to catch you out. Think of it as a practical framework created with one clear goal: getting everyone home safely.
It places a clear responsibility on employers and the self-employed to ensure any work at height is properly planned, supervised, and carried out by competent people using the right gear. A cornerstone of this is making sure equipment, like your ladders, is fit for purpose. This is where a robust inspection process becomes non-negotiable.
The Two Pillars of Ladder Safety
Effective ladder safety really boils down to two distinct but equally important types of checks. It’s crucial to understand the difference and the role each one plays in keeping the workplace safe.
To give you a quick overview, we've put together this table. It breaks down the key differences at a glance, so you can see who's responsible for what, and when.
Ladder Inspection Types at a Glance
| Inspection Type | Who Performs It | When It's Done | Primary Purpose |
|---|---|---|---|
| Pre-Use Check | Every user | Before each and every use | To spot obvious, immediate defects before climbing. Your personal first line of defence. |
| Formal Inspection | A trained, competent person | At regular, scheduled intervals (e.g., every 3-6 months) | A detailed, documented assessment to track the ladder's condition over time and identify gradual wear. |
Let's unpack that a little more.
- Pre-Use Checks: This is a quick, visual and tactile check that every user must perform before each use. It’s your first line of defence, a personal safety habit to catch obvious defects right before you climb.
- Formal Inspections: This is a more detailed, systematic, and documented inspection carried out at regular intervals by a ‘competent person’. This process provides a thorough assessment of the ladder's condition over time.
A pre-use check protects the individual on that day. A formal inspection protects everyone over the long term. Both are essential for a comprehensive safety culture.
Beyond the ladders themselves, it's worth remembering that a truly safe site integrates multiple safety systems. Understanding and implementing other critical safety procedures like Lock Out/Tag Out is paramount for creating a secure environment where risks are actively managed.
Ultimately, embracing a diligent inspection routine isn't just about compliance; it's about valuing the well-being of yourself and your colleagues. Properly maintained equipment is a key component of a safe workspace, and our guide to essential working at height safety equipment can provide further context. The following sections will break down exactly how to perform both types of checks effectively.
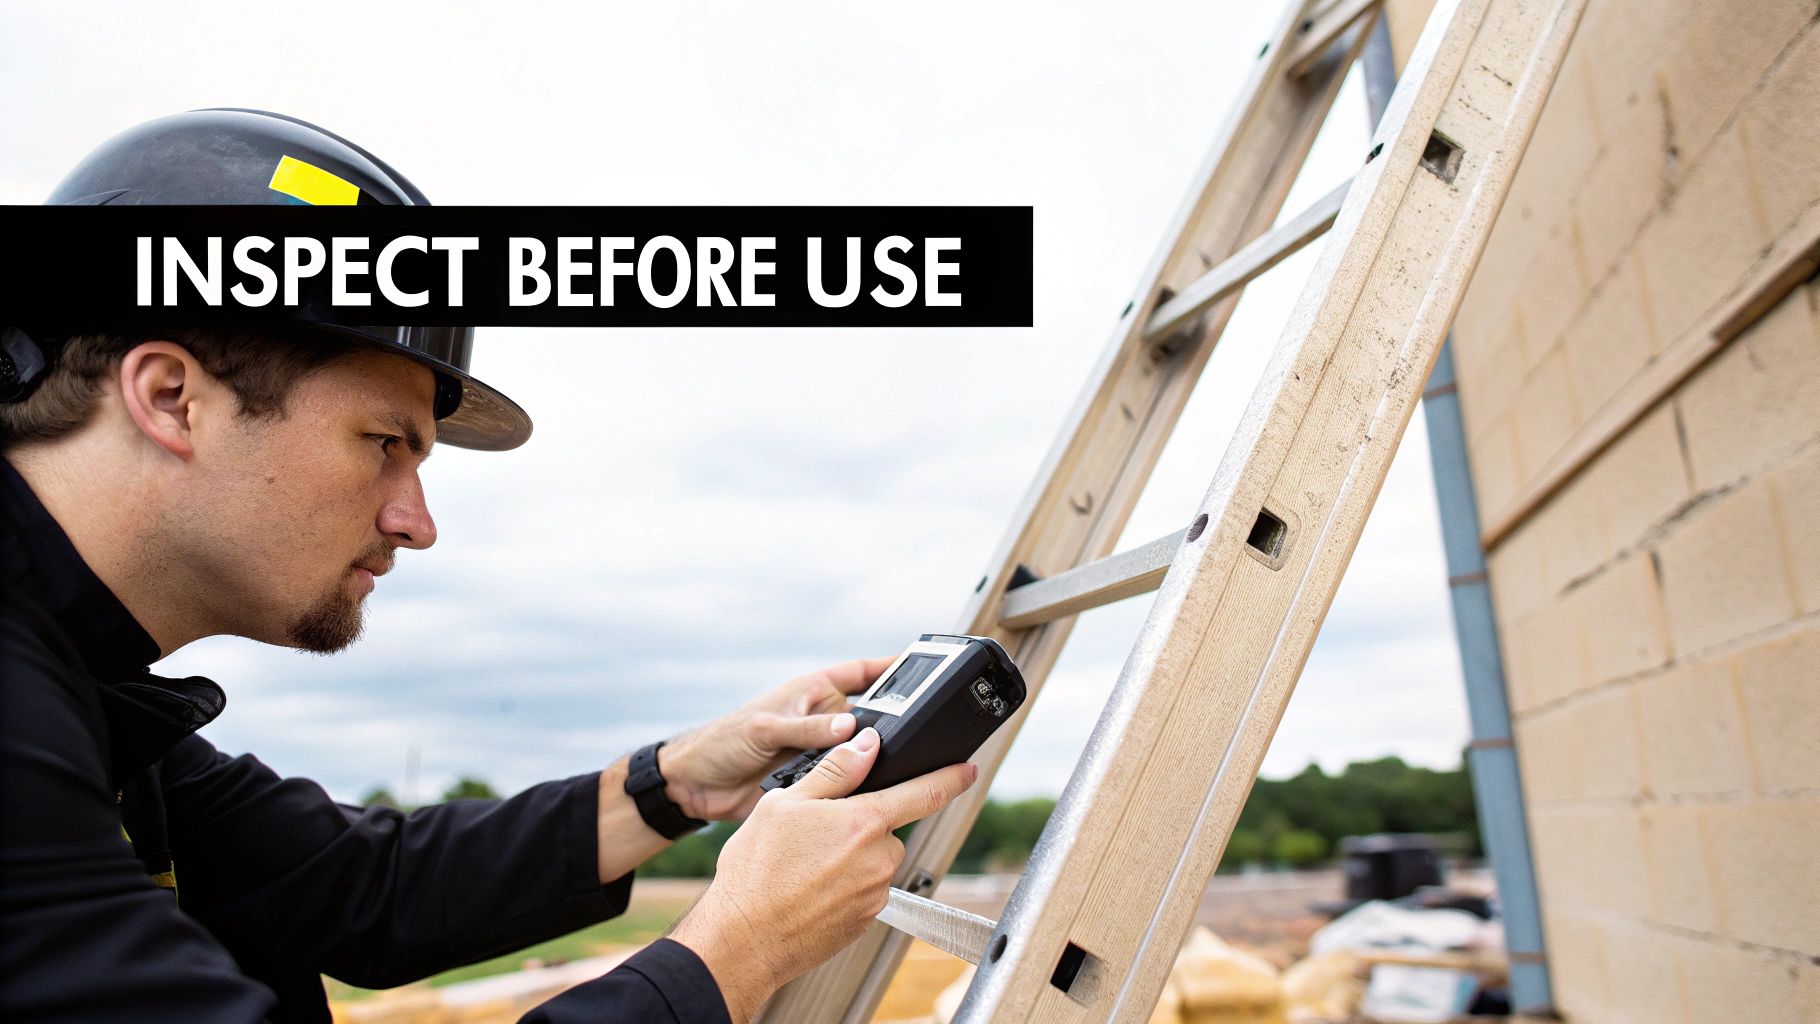
The Daily Pre-Use Check: Your First Line of Defence
 The daily pre-use check is the most personal part of the entire inspection of ladders process. It's a hands-on, practical habit that every single user must develop before their feet even think about leaving the ground. Think of it less as a formal procedure and more as a quick, muscle-memory routine that becomes your first and best line of defence against an accident.
This isn't about paperwork or complex assessments. It’s about a simple, tactile check to spot obvious defects that could have cropped up since its last use. A ladder that was perfectly fine yesterday could have been knocked over, damaged in transit, or simply left in a state that makes it unsafe for the next person.
Start with the Stiles
The stiles are the long, vertical side rails of the ladder—its backbone. They provide the core structural integrity, so you can imagine that any damage here is a major red flag. Run your hands (wearing gloves, of course) along their entire length.
What you're looking for:
- Cracks or Splits: Hairline cracks in fibreglass or wood, and dents or bends in aluminium are immediate fail points.
- Sharp Edges or Burrs: These can cause nasty cuts and often indicate impact damage that has weakened the metal.
- Excessive Dirt or Grease: Anything that could make the ladder slippery needs cleaning off right away.
A significant dent might seem minor, but it can compromise the ladder's ability to handle weight, creating a weak point that could buckle under load. This is a non-negotiable check, every single time.
Inspect the Rungs with Care
Next up, turn your attention to the rungs—the horizontal steps you'll be standing on. Each one needs to be secure, clean, and capable of bearing your full weight without any sign of distress. Give each rung a firm shake.
Here’s your checklist:
- Tightness: Check for any looseness or movement where the rungs connect to the stiles. A wobbly rung is an accident waiting to happen.
- Damage: Look for bent, cracked, or heavily worn rungs. Pay close attention to the non-slip treading; if it's worn smooth, the risk of slipping increases dramatically.
- Contamination: Like the stiles, make sure they are free from mud, oil, or any other slippery gunk.
Imagine trying to keep your footing on a rung slick with oil from a workshop floor—it’s a recipe for disaster. This simple check takes just a few seconds but is critically important.
Check the Feet and Locking Mechanisms
The feet are the only part of the ladder that makes contact with the ground, making them absolutely vital for stability. They should be clean, level, and the anti-slip pads must be in good nick. Caked-on mud from a previous job can turn a stable ladder into a skating hazard on a smooth concrete floor.
If a ladder’s feet are worn, damaged, or dirty, its stability is compromised before you even start to climb. Always check that the anti-slip pads are present and in good condition.
For extension ladders, the locking mechanisms are just as important. You need to be sure they engage smoothly and securely. Check the springs and clasps for any damage or debris that might stop them from locking properly. If a lock feels stiff or doesn't click firmly into place, that ladder is not safe to use.
For extra stability, especially on soft or uneven ground, you might want to consider accessories like our British-made ladder safety spurs, which can significantly improve grip.
Ultimately, if you find any of these defects during your pre-use check, the rule is simple and absolute: do not use the ladder. Take it out of service immediately, tag it clearly as faulty, and tell your supervisor. A ten-minute delay to find a safe alternative is always better than a trip to A&E.
How to Conduct a Formal Ladder Inspection
While your daily pre-use check is an essential habit, the formal inspection of ladders is a whole different beast. This is the deep-dive, systematic process that needs to be documented and carried out by a competent person. It’s about more than just spotting obvious damage; it’s about identifying gradual wear and tear to guarantee the ladder remains safe for everyone throughout its working life.
Think of it as a scheduled MOT for your equipment. This isn't a task to be rushed at the end of a long day. It demands a proper, controlled environment and a sharp eye for detail.
Setting the Stage for a Thorough Inspection
Before you even lay a hand on the ladder, you need to get your surroundings right. Trying to spot a hairline crack or a slight bend in a cluttered, dimly lit corner is a recipe for disaster.
- Find a Well-Lit Area: Good light is non-negotiable. Nothing beats natural daylight, but a bright, clear workshop will do the job. Always keep a good torch handy to get a proper look inside hollow rungs or to highlight fine cracks.
- Create Clear Space: Lay the ladder down on a flat, even surface. You need to be able to get around it and see it from every angle. Inspecting a ladder while it’s still propped against a wall is just asking to miss something crucial.
- Gather Your Tools: You don't need a massive toolkit for this. A torch, a clean rag to wipe down dirty sections, and your inspection records are really all you need.
Having the ladder's service history—its previous inspection reports—is incredibly helpful. It lets you track any issues that were flagged for monitoring and see if they're getting worse. This historical context is what turns a good inspection into a great one.
A Systematic Component-by-Component Review
The secret to a successful formal inspection is being methodical. Don't just give the ladder a quick once-over. Work through it part by part, physically touching and testing each component to ensure nothing is missed.
Stiles and Rails
These are the vertical legs of the ladder—its very backbone. Start at one end and run your hands and eyes down the entire length, checking both the inside and outside faces of each stile.
Look for:
- Bends, Dents, and Twists: Lay the ladder flat and sight down its length like a ruler. Any bowing or deviation from a perfectly straight line is a red flag for structural damage.
- Cracks and Splits: Pay extra close attention to the areas where the rungs join the stiles. This is a major stress point where fractures often start.
- Corrosion and Wear: On metal ladders, look for anything more than surface rust. On fibreglass models, check for deep gouges, splintering or fraying. This isn't just cosmetic damage; it's a sign the material is breaking down.
A bent stile means the ladder's geometry is compromised and it can no longer bear weight safely. It has to be taken out of service immediately, no questions asked.
Rungs and Treads
Every single rung is a critical load-bearing point and needs to be checked individually.
- Security: Grab each rung with both hands and try to twist or move it. There should be absolutely no movement where it connects to the stile. Any play is a sign of failure.
- Damage: Scan for any bending in the middle of the rungs, which often points to repeated overloading. Also check for cracks, sharp edges, or other damage.
- Surface Condition: The anti-slip grooves on the rungs must be clean and well-defined. If they're clogged with muck or worn smooth, the rung is no longer providing a secure footing.
Feet and Stabilisers
A ladder's stability starts right from the ground up. The feet are arguably one of the most important safety components, yet they're often the most neglected.
- Condition of Anti-Slip Pads: The rubber or plastic pads must be present and in good shape. If they are cracked, split, or worn down to the metal housing, they've lost their grip.
- Movement: Many ladder feet are designed to pivot to sit flat on the ground. Check that this movement is smooth—not seized up or flopping around loosely.
- Cleanliness: The feet must be completely free of mud, grease, paint, or anything else that could cause the ladder to slip.
"A ladder with worn or missing feet is like a car with bald tyres—it has lost its connection to a stable surface and is dangerously unpredictable."
Labels and Markings
Don't just gloss over the labels; they contain vital safety information that must be clear and legible.
This includes:
- Standard Compliance: The label confirming it meets a specific standard (e.g., BS EN 131) must be present and readable.
- Load Rating: The maximum safe working load has to be clearly visible so users know its limits.
- Unique Identifier: The ladder's unique ID number needs to be intact for your inspection records.
If these labels are gone or unreadable, the ladder technically fails the inspection because a user can't access crucial safety information.
When inspecting ladders, it's also worth creating a clear log of common issues you find. This helps everyone on site know what to look out for. Here's a quick table of frequent problems and what to do about them.
Common Ladder Defects and Recommended Actions
| Defect Found | Potential Risk | Action Required |
|---|---|---|
| Bent, Cracked, or Twisted Stiles | Structural failure, collapse | Immediately remove from service. Do not attempt to repair. |
| Loose or Damaged Rungs | Rung failure, loss of footing, falls | Immediately remove from service. The ladder is unsafe to use. |
| Worn, Damaged, or Missing Feet | Ladder slipping or sliding during use | Immediately remove from service until feet can be replaced with manufacturer-approved parts. |
| Worn Anti-Slip Tread on Rungs | Slipping, loss of footing | Clean the rungs. If tread is still worn, remove the ladder from service. |
| Corrosion or Rust (Metal Ladders) | Weakened structure, potential failure | Minor surface rust may be cleaned and monitored. Significant corrosion requires removal from service. |
| Splinters or Fraying (Fibreglass) | Weakened structure, risk of electric shock | Minor surface wear may be acceptable. Deep gouges or fraying means the ladder must be retired. |
| Missing or Illegible Safety Labels | User unaware of load limits or standards | Replace labels if possible. If not, the ladder should be taken out of service. |
This isn't an exhaustive list, of course, but it covers the most serious defects you're likely to encounter. Always err on the side of caution.
Fixed ladder inspections in the UK fall under specific Health and Safety Executive (HSE) guidelines, which demand several tiers of checks. The HSE states that fixed ladders need a pre-use check every time, more detailed formal inspections by a trained person every three months, and an in-depth annual inspection by a qualified expert. A massive part of this process is ensuring a 'competent person' carries out the inspection, which is why proper training is so critical. For more on this, you can review our guide on what constitutes competent ladder inspection training.
Decoding Ladder Standards and Common Failures
When you're doing an inspection of ladders, you need to know the rules of the game. In the UK, the gold standard for ladder safety is known as BS EN 131. This isn't just a jumble of letters and numbers; it's your assurance that the ladder has been properly designed and tested to meet strict requirements for strength, stability, and durability.
Think of it as the difference between a professional-grade tool and a cheap knock-off. A ladder that meets BS EN 131 has been put through its paces, with rigorous tests on everything from rung strength and stile rigidity to how well the feet grip the ground. It’s a stamp of quality confirming it’s built for professional use and can handle the demands of a worksite safely.
The Dangers of Non-Compliant Ladders
The big problem is that not all ladders are created equal. The market is, unfortunately, flooded with non-compliant and even counterfeit ladders that might look the part but simply don't have the structural integrity to be safe. A lower price tag can be tempting, but it's a dangerous gamble. These ladders often use shoddy materials or poor construction, which can lead to catastrophic failure without any warning.
A cheap, uncertified ladder could buckle under a normal load, a rung could detach, or it might just lack the basic stability to stop a fall. This is exactly why checking for the BS EN 131 mark is a non-negotiable part of buying a new ladder and carrying out its first inspection. Without it, you have no real guarantee of the ladder's safety.
This simple infographic breaks down the core process of ladder inspection into three key stages.
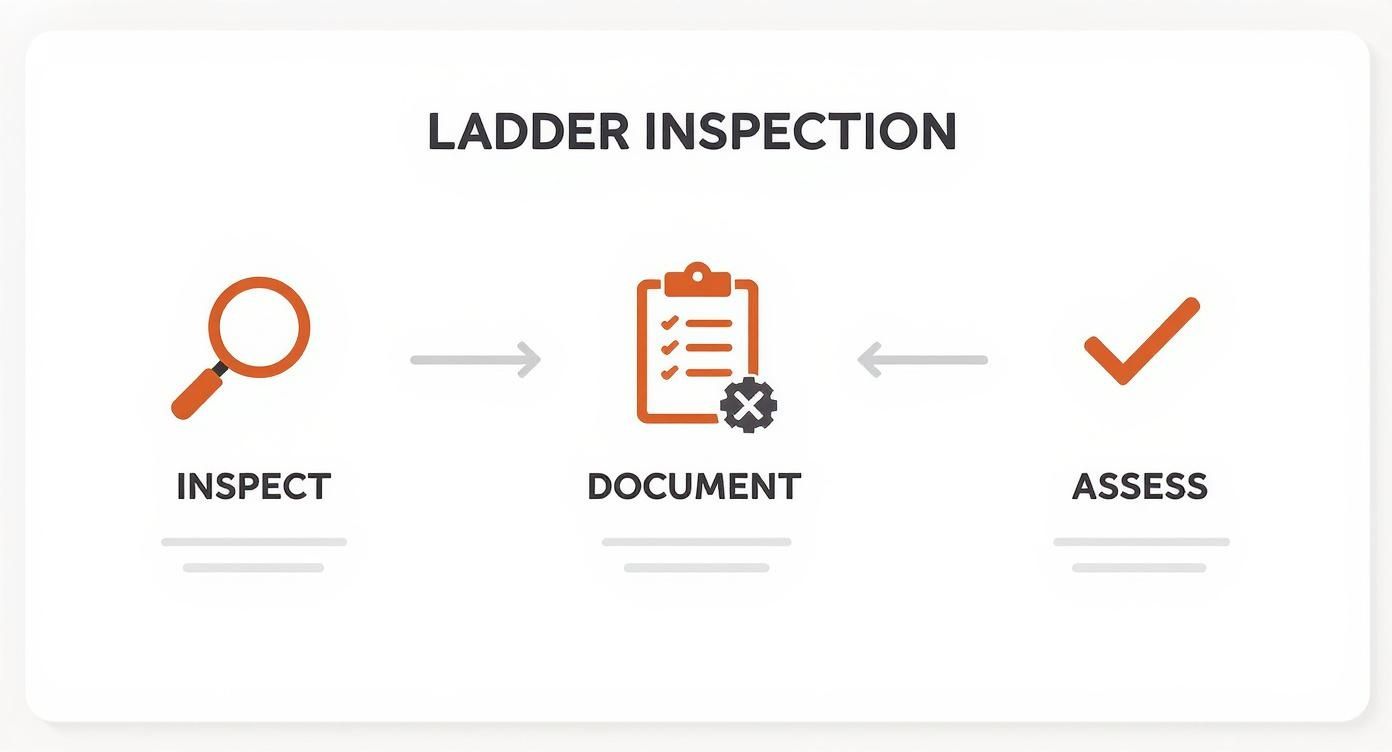
As you can see, inspection isn't a one-off task. It's a continuous cycle of checking, documenting, and making a decision, ensuring any unsafe gear is immediately taken out of service.
Why Do Ladders Fail to Meet Standards?
Ladders can fail to meet safety standards for a whole host of reasons, both from faults in manufacturing and from general wear and tear on site.
Some of the most common reasons for non-compliance include:
- Inferior Materials: Using weaker grades of aluminium or fibreglass that just can't handle the required loads.
- Poor Construction: Flaws in how the rungs are fixed to the stiles, creating weak points that are bound to fail.
- Design Flaws: Incorrect dimensions or geometry that make the ladder inherently wobbly or unstable.
- Lack of Safety Features: Forgetting essential bits like non-slip feet or having dodgy locking mechanisms on extension ladders.
The issue of non-compliance is far more widespread than most people think. A startling 2022 surveillance survey from the Ladder Association and UK trading standards found that an alarming 82% of tested telescopic ladders failed to meet the required safety standards under BS EN 131. That shocking statistic shows just how many dangerously unsafe ladders are out there. You can read the full report on telescopic ladder safety to get a sense of the scale of the problem.
A safety standard isn't just a suggestion; it's the minimum requirement for keeping people safe. Always verify compliance before you buy or climb.
While market surveillance teams work to get these unsafe products off the shelves, your first line of defence is being an informed user. Knowing what to look for—and what a solid, compliant ladder feels like—gives you the power to reject dangerous equipment and protect yourself and your crew from preventable accidents.
Mastering Documentation for HSE Compliance
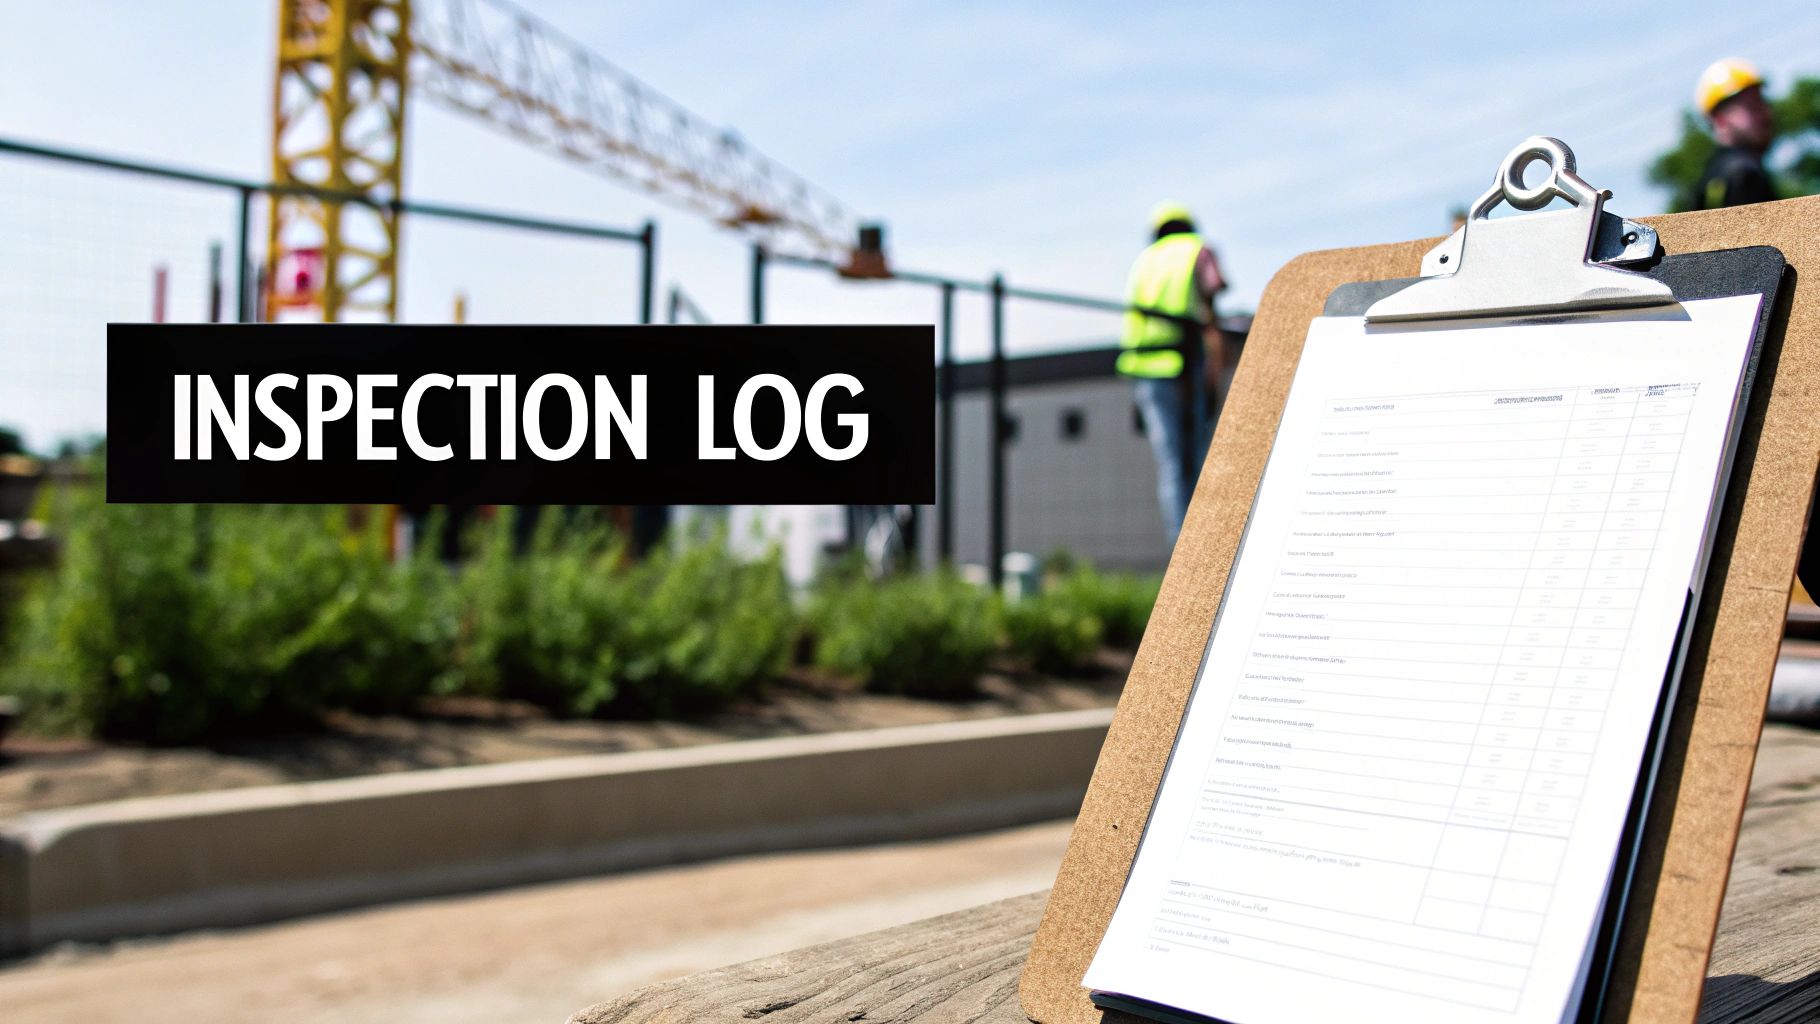
Let's be honest, paperwork often feels like the dullest part of the job. But when it comes to the inspection of ladders, it’s your most powerful tool. A solid paper trail isn’t just about ticking boxes for the Health and Safety Executive (HSE); it's your concrete proof of a proactive safety culture and a legal necessity that can be invaluable.
Think of it as the ladder's personal history file. In the unfortunate event of an incident or during a routine HSE visit, these records demonstrate your due diligence. Without them, it’s just your word against theirs, which is a position no business ever wants to find itself in.
Creating a Compliant Paper Trail
Every formal inspection needs to be recorded, and each record has to contain a few non-negotiable pieces of information. This consistency is what builds a robust and easily auditable system.
Your inspection log should always include:
- A Unique Ladder ID: Assign a distinct number or code to every single ladder you own. This is crucial for tracking its specific history over time.
- The Inspection Date: Simply, the exact date the formal inspection was carried out.
- The Inspector's Name: The full name of the competent person who performed the check must be clearly noted.
- Detailed Findings: Don't be vague here. List any defects found, no matter how minor. Instead of "rung damaged," write "third rung from top is bent in the centre."
- A Clear Verdict: The record must end with an unambiguous "Pass" or "Fail" decision.
This clear, concise record-keeping makes it simple to see a ladder's condition at a glance and track any developing issues before they become serious hazards.
The Ladder Register: Your Central Hub
To keep everything organised, every business should maintain a central ladder register. This is essentially a master list of every ladder on site. It’s the first document an HSE inspector will ask to see, so it needs to be accurate and completely up-to-date.
Here’s a simple template you can adapt:
| Unique ID | Ladder Type | Manufacturer | Date Acquired | Location | Last Inspection | Next Inspection Due | Status |
|---|---|---|---|---|---|---|---|
| EXT-001 | 3-Section Extension | Bison | 10/01/2023 | Workshop | 15/06/2024 | 15/09/2024 | In Service |
| STP-002 | 6-Tread Step Ladder | Bison | 15/03/2023 | Van 1 | 15/06/2024 | 15/09/2024 | In Service |
| PLT-003 | Podium Step | Bison | 02/05/2024 | Site A | 01/06/2024 | N/A | QUARANTINED |
Maintaining this register is a simple but powerful habit. Using modern tools like building inspection software can also make this process much more efficient and accurate, which is a huge help when you're trying to keep on top of HSE compliance.
Tagging Systems for At-a-Glance Safety
While a register is great for your records, it doesn’t help the person on the ground about to use the ladder. That’s where a physical tagging system comes in. A good tag provides an instant visual cue about the ladder's safety status, preventing someone from accidentally using faulty equipment.
A simple, colour-coded tag can be the most effective communication tool on a busy site. It removes all doubt about whether a piece of equipment is safe to use.
A common approach is a "traffic light" system, which works brilliantly:
- Green Tag: Shows the ladder has passed inspection and is safe for use. It should also clearly display the date of the next required inspection.
- Yellow Tag: Can be used to indicate a minor issue that needs monitoring but doesn't make the ladder immediately unsafe.
- Red Tag: This is the most important one. A red "Do Not Use" tag means the ladder has failed its inspection and must be removed from service and quarantined immediately.
This simple system bridges the gap between the detailed paperwork in the office and the practical, day-to-day use of the equipment out on site. For a deeper look into setting up an effective system, you can learn more about the different types of ladder inspection tags and how they work. Getting your documentation right is your legal shield and the very foundation of a safety programme you can trust.
Common Questions About Ladder Inspections
Even with the best processes in place, you’re bound to have questions about the specifics of ladder inspections. Getting clear, straightforward answers is the key to managing your equipment confidently and making sure your safety programme is both practical and fully compliant with UK regulations.
How Often Do Ladders Need a Formal Inspection in the UK?
You won't find a single law that gives a rigid, one-size-fits-all schedule. Instead, the Health and Safety Executive (HSE) expects a sensible, risk-based approach that really depends on how and where your ladders are used.
Just think of it this way: the tougher the environment, the more often you should be inspecting.
- Heavy Daily Use: For a ladder on a busy construction site or in constant industrial use, a formal, recorded inspection every three months is considered best practice.
- Regular, Less Frequent Use: If a ladder is used a few times a week in a warehouse or workshop, checking it every six months is a good, solid interval.
- Occasional Use: For ladders that only come out for specific, infrequent jobs, a thorough annual inspection is usually more than enough to stay on top of safety.
No matter what your regular schedule is, a formal inspection is always needed after any event that could have damaged the ladder. This could be anything from it being dropped, hit by a vehicle, or exposed to serious heat.
This event-driven rule is non-negotiable and trumps any routine schedule you've got. It’s your safety net to catch potentially compromised equipment before it can cause an accident.
Who Counts as a Competent Person to Inspect a Ladder?
"Competent person" is a term that gets thrown around a lot, but what does it actually mean on the ground? It’s simply someone who has the right mix of training, hands-on experience, and knowledge to spot a defect and—most importantly—understand what could go wrong because of it.
This doesn't mean you have to call in an external expert every time. An in-house team member, like a site supervisor or a maintenance technician, can absolutely be your competent person if they tick the right boxes.
A competent person needs:
- Formal Training: They should have completed a recognised course, like one from the Ladder Association, which gives a solid foundation in inspection techniques.
- Practical Experience: They need to be genuinely familiar with the types of ladders they’re checking. They know how a ladder should look, feel, and function when it's in good nick.
- Knowledge of Standards: They must understand the relevant legal requirements and safety standards, such as BS EN 131, to make an informed judgement call.
At the end of the day, competency is about being able to carry out a thorough, systematic inspection and make a confident, justifiable decision on whether a ladder is safe to use.
What Do I Do if a Ladder Fails an Inspection?
If a ladder fails, there's no room for second-guessing. You need to act immediately and decisively to stop anyone from accidentally using it.
First, take it out of service right away. Slap a highly visible "DO NOT USE" tag on it so its status is crystal clear to everyone on site.
Second, get it out of there. Move the ladder to a designated quarantine area, completely separate from all your good-to-go equipment. This stops someone grabbing it in a hurry without spotting the tag.
Finally, the competent person or a manager has to decide its fate. Can it be safely repaired by a specialist using approved parts? Or is the damage structural, meaning the ladder must be destroyed and disposed of so it can never find its way back into service? Whatever you do, never be tempted to use a failed ladder, even for a "quick little job."
Do Brand-New Ladders Need an Inspection Before Use?
Yes, absolutely. Every new ladder needs a proper once-over before it’s used for the first time. It’s a critical step that should never be skipped.
This initial check does two things. It confirms the ladder wasn't bashed about during shipping or while sitting in storage. It also verifies that it’s the right type of ladder for the job you have in mind and meets all the required UK safety standards, like BS EN 131.
This first inspection must be formally recorded. The ladder should be given its own unique ID and added to your equipment register. This simple action starts the ladder's documented history from the moment it arrives on your site.
At Bison Products, we know that workplace safety is about more than just having the right gear. It's about having the knowledge and processes to use it safely, day in and day out. As a family-owned British manufacturer since 1972, we're committed to providing not only high-quality, compliant ladder safety accessories but also the practical guidance you need to maintain a safe working environment. Explore our full range of British-made safety solutions today.