

Your Complete UK Guide to Ladder Inspection Training
Proper ladder inspection training is all about learning how to systematically check ladders for faults, damage, or wear and tear, ensuring they're safe to use every single time. It gives a designated 'competent person' the know-how to spot potential hazards before they can cause an accident, keeping your operations compliant and your team safe under UK safety laws.
Why Ladder Inspection Training Is a Game-Changer

Let's be honest, ladder safety can sometimes feel like just another box to tick on a long list of site duties. But what if it’s the one thing that prevents a serious, life-altering accident on your watch?
Think of this guide as your practical roadmap to understanding why this training is so crucial. We'll cut through the jargon to show you exactly how proper ladder inspection training protects your team, keeps you compliant with UK law, and builds a genuine safety-first culture. This isn't just about memorising rules; it's about gaining the confidence to spot a hazard before it becomes a headline.
Moving Beyond a Tick-Box Mentality
Here in the UK, the consequences of overlooking ladder safety are severe. According to the Health and Safety Executive (HSE), falls from height remain one of the leading causes of workplace fatalities and serious injuries. Between 2019 and 2021, falls accounted for roughly 40% of workplace fatalities annually.
That’s a sobering statistic that really drives home the non-negotiable importance of regular inspections, as required by the Work at Height Regulations 2005.
Effective training transforms ladder checks from a chore into a core part of your risk management strategy. It gives your designated 'competent person' the skills to:
- Proactively Identify Risks: Spot the subtle signs of damage like hairline cracks, bent stiles, or worn feet that an untrained eye would easily miss.
- Ensure Legal Compliance: Confidently meet your obligations under HSE regulations, protecting your business from hefty fines and legal action.
- Build a Safer Work Environment: Foster a culture where safety is everyone's responsibility, starting with the kit your team uses every single day. Good training even ties into understanding correct on-site behaviour, which you can explore in our guide to ladder etiquette.
The impact of this training is hugely amplified when your team has solid materials to learn from. If you're looking for pointers, there are some great resources on how to create effective training materials that genuinely work. Ultimately, investing in this knowledge is an investment in your team's well-being and your company's reputation.
Navigating Your Legal Duties in the UK
Worried about keeping up with UK safety regulations? You're not alone. The legal side of ladder safety can feel a bit daunting, but it really boils down to one key piece of legislation: The Work at Height Regulations 2005.
This isn't just dense legal text to get bogged down in. Think of it as a practical framework designed to keep people safe on the job. Let's break down what this actually means for you, whether you're an employer managing a team or someone using a ladder yourself.
The core principle is simple: any work at height must be properly planned, supervised, and carried out by competent people. This puts a direct legal duty on employers to make sure all their equipment is fit for purpose. This responsibility is exactly why formal ladder inspection training is so important—it's your proof that you’re taking these duties seriously.
The Absolute Must-Dos for Compliance
Meeting your legal obligations isn’t about creating mountains of paperwork. It’s about putting a few common-sense practices into place that protect everyone on site.
Here are your key responsibilities under the regulations:
- Perform Regular Inspections: All equipment used for working at height, including every single ladder, must be inspected at suitable intervals by a competent person.
- Conduct Risk Assessments: Before any work kicks off, you have to assess the risks and figure out how to manage them. This includes choosing the right ladder for the job in the first place.
- Keep Solid Records: A clear, consistent record of your inspections is your proof of compliance. It shows you're actively managing the condition of your equipment.
Following these steps isn't just about avoiding a slap on the wrist from the Health and Safety Executive (HSE). It’s about building a system where potential dangers are spotted and sorted before they can cause real harm.
Understanding the 'Why' Behind the Rules
The financial and human cost of accidents at work really highlights why these regulations matter so much. The economic burden of workplace injuries in the UK, especially in construction, is huge.
Back in 2019/2020, the estimated cost of workplace injuries and new cases of work-related ill health in this sector was a staggering £1.2 billion. Effective training directly helps slash these costs and, more importantly, prevents personal tragedy. You can get more details by exploring the legal requirements for ladder inspections.
Ultimately, accredited training helps you prove you’re doing everything right. It also ensures you are using equipment correctly and safely, which can always be improved with the right ladder accessories to boost stability and function.
The Three Essential Tiers of Ladder Inspection
Not all ladder inspections are the same, and knowing the difference is vital for keeping everyone safe on site. A proper safety system isn't built on a single, one-off check; it relies on three distinct tiers of inspection. This approach makes sure everyone, from the person using the ladder day-to-day to a trained specialist, has a part to play.
Think of it like getting your car checked. You give it a quick once-over before you drive, but you also rely on a qualified mechanic for its annual MOT. Ladders are no different. Each inspection tier serves a specific purpose, happens at a different frequency, and requires a different level of detail.
The Daily Pre-Use Check
This is the quickest and most frequent check, but you could argue it's one of the most important. The Pre-Use Check is a fast, 30-second visual and physical review that the user absolutely must carry out every single time before they climb a ladder.
The goal here is to spot obvious, immediate hazards that might have cropped up since it was last used. Was it dropped getting it off the van? Has a locking bar worked itself loose?
It’s your first and best line of defence. Imagine a roofer grabs an extension ladder and a quick glance reveals a small but fresh crack in a stile from where it was knocked over earlier. Spotting that tiny fault prevents a potential collapse under his weight later that day. It’s a simple habit that makes a world of difference.
The Formal Visual Inspection
Moving up a level from the daily check, the Formal Visual Inspection is a more structured and documented process. This needs to be carried out at regular intervals—usually monthly or quarterly, depending on how often the ladder is used and the kind of environment it's in.
This check must be done by a formally trained 'competent person' who knows exactly what to look for. They’ll follow a detailed checklist, examining every single component from the feet to the stiles and rungs. Crucially, they record their findings. This creates a paper trail for each piece of equipment, helping you track wear and tear over time. Keeping your ladders secure during transport with a quality ladder clamp can also seriously cut down on the sort of damage these inspections often pick up.
The In-Depth Detailed Inspection
The Detailed Inspection is the most thorough assessment you can do. It's typically carried out annually or after a specific incident that might have damaged the ladder's structural integrity, like a significant fall or a heavy impact. This level of inspection demands a higher level of expertise, often from a qualified specialist or a third-party inspection company.
This goes way beyond just looking at the ladder. It can involve stress tests or deep dives into locking mechanisms, rivets, and structural joints to find hidden faults you’d never spot with the naked eye. It’s the ultimate health check for your equipment, giving you complete confidence that it's still fit for purpose and meets all the relevant British Standards.
To make things clearer, let's break down how these three tiers stack up against each other.
Comparing the Three Tiers of Ladder Inspection
| Inspection Type | Frequency | Performed By | Key Focus Areas |
|---|---|---|---|
| Pre-Use Check | Before every use | The user/operator | Obvious damage: cracks, missing feet, bent rungs, loose parts. |
| Formal Visual Inspection | Monthly/Quarterly (risk-based) | A trained 'competent person' | Detailed visual check of all parts, following a checklist, and recording the outcome. |
| In-Depth Detailed Inspection | Annually or after an incident | A qualified specialist or third party | Thorough examination, potentially including stress tests, to find non-visible faults. |
As you can see, each inspection builds on the last, creating a comprehensive safety net that protects users at every stage.
This infographic helps visualise the key differences between each inspection tier at a glance.
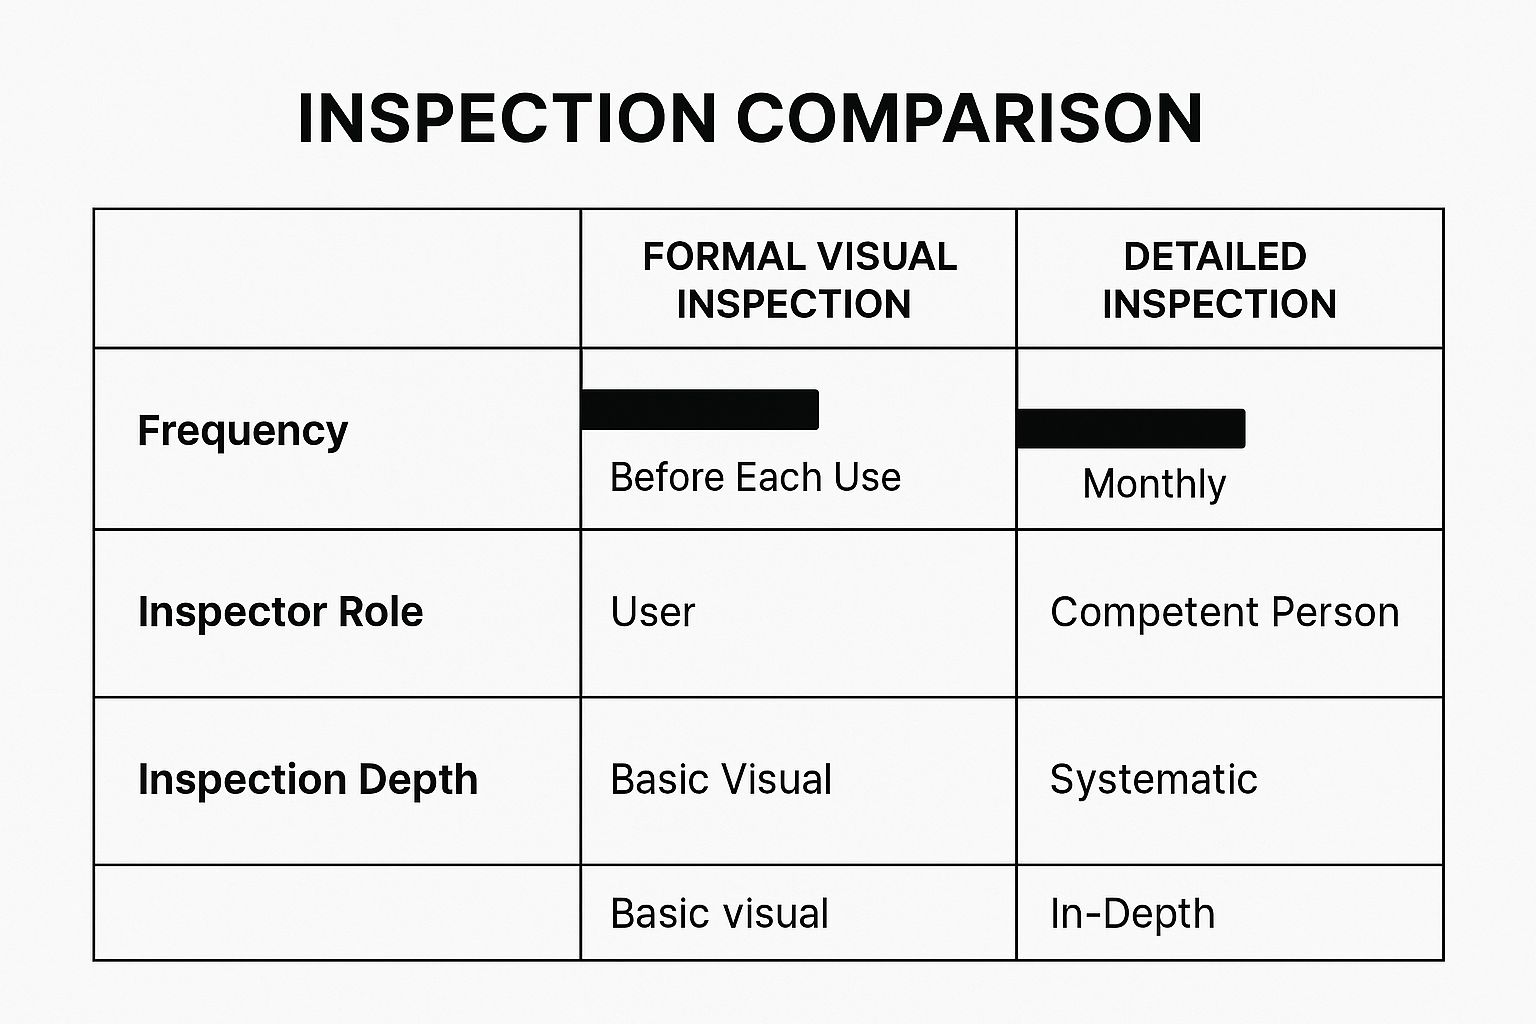
The graphic makes it clear how responsibility and the depth of the inspection increase over time, forming a solid foundation for your ladder safety programme.
Building Your Practical Inspection Checklist
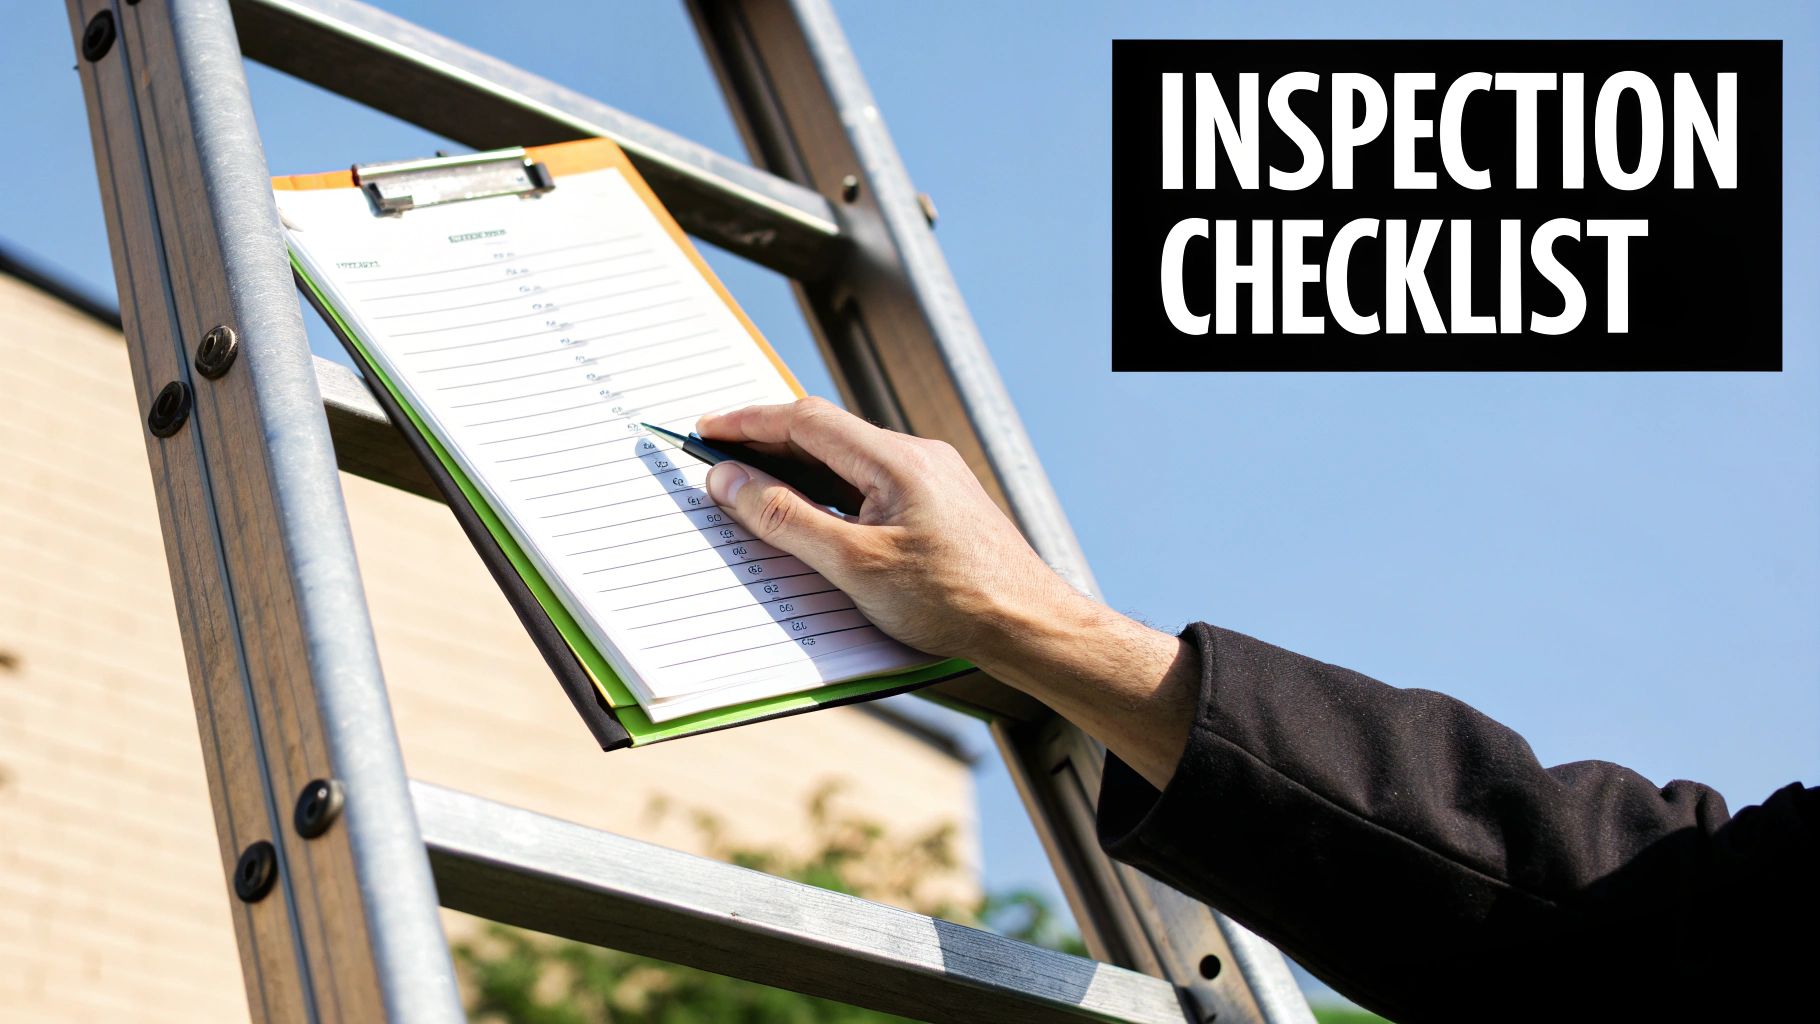
When it comes to ladder inspection training, the best approach is always a targeted, component-based check you can run through every single time. It takes the guesswork out of the equation.
This checklist breaks your focus down into three critical areas: Stiles and Rungs, Feet and End Caps, and Locking Mechanisms.
Think of this guide as your hands-on tool. Make sure to record every finding to build a solid, reliable audit trail.
Inspecting Stiles And Rungs
Start with the basics. Examine each stile from top to bottom, looking for any bends, cracks, or signs of corrosion.
Next, run a gloved hand along every single rung. You're checking for twists, loose fittings, or anything that feels 'off'. Don't rush this part.
It might seem minor, but small defects in these areas are responsible for 73% of ladder structural failures. They absolutely deserve your full attention.
- Check that stiles are perfectly straight with no surface damage.
- Verify that rungs align symmetrically and don't have any 'play' or movement.
- Look closely for hidden cracks, splitting, or corrosion, especially around welds.
We heard about a builder in Essex who spotted a slight twist on a rung just above the midpoint of his ladder. That simple catch prevented a nasty fall and really highlights why these routine checks are non-negotiable.
Checking Feet And End Caps
A ladder's feet often show the first signs of wear and tear, and they're absolutely critical for stability.
Take a good look at the rubber end caps for any splits or heavy wear. Make sure they still grip firmly when placed on flat ground. A worn-out foot is an accident waiting to happen.
- Confirm end caps fit snugly and aren't showing any cracks.
- Ensure the non-slip surfaces are intact and clear of mud, oil, or debris.
- If a cap wobbles or slides under pressure, it needs replacing immediately.
There was a case where an end cap failure sent a roofer tumbling in Birmingham, a stark reminder of how high the stakes are for these simple components.
Looking after these parts can often extend the life of your ladder by 2 years or more.
You might also find our guide on ladder stabiliser legs useful for boosting ladder rigidity, especially on uneven terrain. These accessories are a great addition, but your base inspections must still account for the real-world ground conditions you face every day.
Testing Locking Mechanisms
Finally, turn your attention to all the moving parts: lock bars, spreaders, and hinges.
Engage and disengage each locking mechanism one by one. You want to feel a smooth movement with absolutely zero play or slack when it's locked in position.
- Look for any bent cams or worn-out pins.
- Check that springs still have consistent, strong tension.
- Confirm every lock snaps firmly into position and holds securely.
A single loose hinge once led to a ladder collapsing on a busy London site. The consequences can be severe.
Any ladder that fails these tests must be tagged out immediately. Don't try to use it—arrange for a proper repair or a complete replacement straight away.
A thorough, component-by-component checklist isn't just bureaucracy; it gives you the confidence to climb with genuine peace of mind.
| Component | What To Look For |
|---|---|
| Stiles and Rungs | Bends, cracks, corrosion, and any movement or 'play'. |
| Feet and End Caps | Grip integrity, splits, and wear on non-slip surfaces. |
| Locking Mechanisms | Smooth action, zero slack when engaged, and proper spring tension. |
By embedding this checklist into your ladder inspection training, you can systematically remove dangerous guesswork and elevate safety on every single job.
Quick Tips For Effective Checks
- Keep a labelled clipboard with a printed checklist handy every day on site.
- Use a torch to spot hairline cracks, especially in shaded areas or on dull days.
- Always wear gloves. You'll feel slight irregularities that your bare hands might miss.
- Record findings immediately. It's easy to forget small details during a busy shift.
- Review any safety tags on ladders each morning before use to catch newly flagged issues.
Apply these quick tips alongside your checklist to make your inspections even sharper. Stay vigilant.
Mastering Records and Ladder Tagging
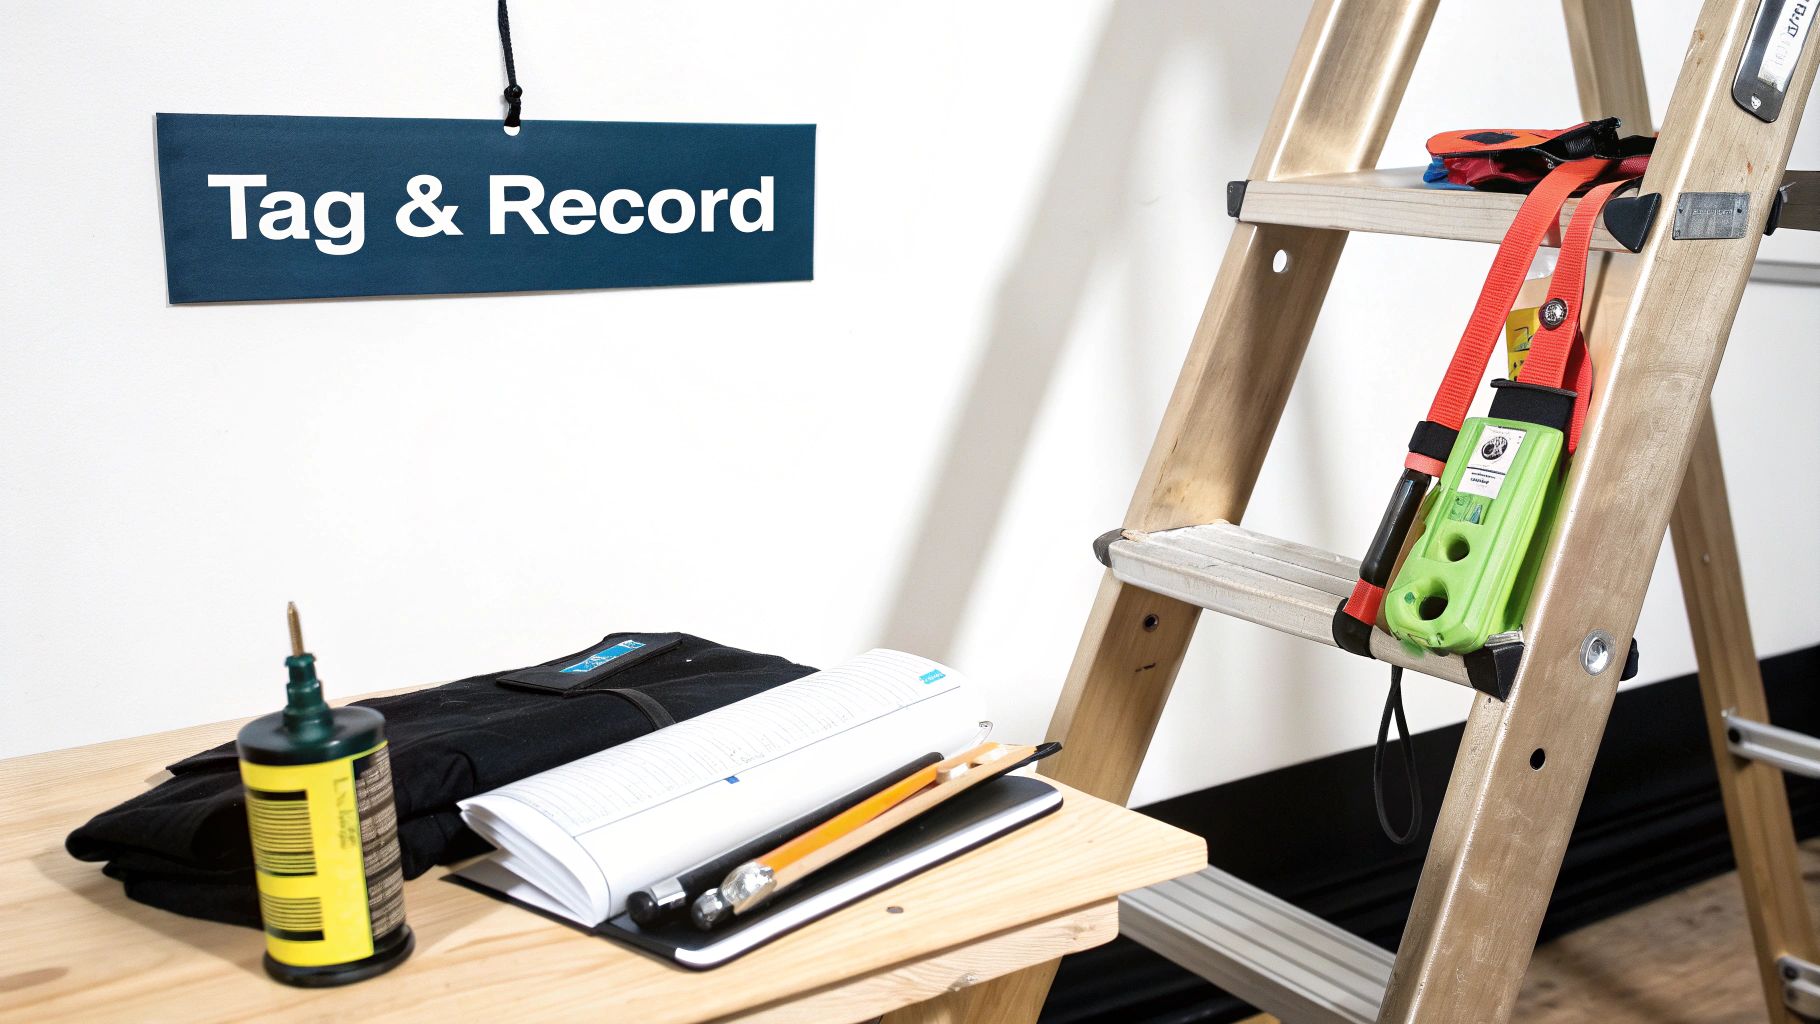
A great inspection is completely pointless if it's not documented properly. Think about it: without a clear record, how can you prove to the Health and Safety Executive (HSE) that you're meeting your legal duties? More importantly, how does the next person know if the ladder is safe to climb? This is where meticulous record-keeping and a simple tagging system are absolutely essential.
This part of your ladder inspection training is less about spotting faults and more about communicating them effectively. It’s the final, crucial step that closes the loop on safety, preventing dangerous mix-ups on a busy site and creating an audit trail that protects both your team and your business.
Creating an Ironclad Inspection Record
Your inspection records don't need to be overly complicated, but they must be consistent and contain specific details. Whether you use a durable logbook kept with the equipment or a slick digital app on a tablet, the fundamental information you capture should always be the same.
A solid record for each ladder should always include:
- A Unique Identifier: Give every single ladder its own ID number (e.g., EXT-001 for an extension ladder). This ensures you're tracking the history of a specific piece of equipment, not just a generic type.
- Inspection Date: The exact date the formal visual inspection was carried out.
- Inspector's Name: The full name of the competent person who performed the check.
- Findings and Actions: A clear summary of what was found, noting any defects or wear. This section must also state the action taken—whether the ladder passed, was repaired, or was removed from service.
- Next Inspection Date: The date the next formal inspection is due.
A detailed log is more than just paperwork; it’s a living history of your equipment. It helps you spot recurring issues, track the lifespan of your ladders, and make informed decisions about repairs versus replacements.
The Power of a Simple Tagging System
While records are vital for compliance, a visual tagging system provides instant, on-the-spot communication for everyone on site. It’s a simple but incredibly effective way to prevent a faulty ladder from being used by mistake. The system is usually colour-coded for total clarity.
A common and effective approach uses a three-tag system:
- Green Tag ("Safe to Use"): This tag gets attached after a successful inspection. It clearly displays the inspection date, the inspector’s name, and the next due date. Anyone grabbing this ladder knows it's been checked and is good to go.
- Yellow Tag ("Caution - Under Observation/Repair"): This might be used for equipment with a minor, non-critical issue that has been noted and is scheduled for repair. It's a clear signal for users to be extra vigilant.
- Red Tag ("Do Not Use - Unsafe"): This is the most critical tag of all. It immediately quarantines a ladder that has failed inspection. It should state the reason for failure and be fixed securely to the ladder until it's either professionally repaired and re-inspected or permanently disposed of.
Finding the Right Ladder Inspection Training Course
Ready to get certified? Choosing the right course is about gaining real, practical skills, not just a piece of paper. Investing in quality ladder inspection training is a critical step, but with so many providers out there, how do you pick one that genuinely builds competence?
The first thing to look for is accreditation from a respected body. In the UK, this means seeking out courses recognised by organisations like The Ladder Association. Their training programmes are built around the legal and safety standards you need to know, like the Work at Height Regulations 2005.
A course from an accredited provider ensures you're covering current legislation and detailed inspection procedures, which is vital for becoming legally competent to inspect ladders. You can learn more about their comprehensive training courses and what’s included.
Balancing Theory with Hands-On Practice
A great training course is more than just a PowerPoint presentation. While understanding the theory and your legal duties is essential, the real learning happens when you get your hands on actual equipment.
Look for a curriculum that explicitly balances classroom learning with practical, hands-on sessions. You should have the opportunity to inspect various types of ladders—step, extension, and combination—with real-world defects. This is what builds the confidence to make the right call back on site.
To make sure your team develops genuine skills, prioritise courses that adopt a competency-based training approach. It's a method that focuses on proving you can do the job, not just that you sat in a classroom.
Choosing the Right Training Format
Providers often offer different formats, and it's worth thinking about what works best for your team's schedule and learning style.
- In-Person Training: Held at a dedicated training centre, this format offers a focused environment away from workplace distractions. It’s ideal for individuals or small groups.
- On-Site Training: This is where the trainer comes to you. It's highly effective because it allows your team to train using the exact ladders they see every day, right in their familiar environment.
- Online/Blended Learning: While convenient for the theory, make sure any online course is combined with a practical, in-person assessment. You can't learn to spot a faulty rung through a screen.
Ultimately, the best course is one that fits your operational needs while delivering accredited, practical, and engaging content that makes your workplace safer.
At Bison Products, we champion safety and quality with our range of British-made ladder accessories designed to support a safe working environment. Explore our solutions at https://www.bisonproducts.co.uk.